Choosing the Right Base for a Shipping Container
Table of Contents
- Table of Contents
- Assessing Site Conditions and Soil Stability
- Evaluating Load-Bearing Capacity
- Managing Drainage and Moisture Runoff
- Concrete Slab Foundations for Permanent Structures
- Reinforced Raft Foundations
- Piers and Footings for Elevated Setups
- Poured Concrete Sonotubes
- Pre-cast Concrete Blocks
- Gravel and Aggregate Pad Solutions
- Installing a Geotextile Layer
- Innovative Screw Piles and Helical Anchors
- Eco-Friendly and Temporary Base Options
- Railroad Ties and Timber Sleepers
- Critical Leveling and Alignment Techniques
- Shimming and Corner Casting Support
- Long-Term Maintenance and Foundation Inspection
- Final Checklist
Table of Contents
- Assessing Site Conditions and Soil Stability
- Concrete Slab Foundations for Permanent Structures
- Piers and Footings for Elevated Setups
- Gravel and Aggregate Pad Solutions
- Screw Piles and Helical Anchors
- Eco-Friendly and Temporary Base Options
- Critical Leveling and Alignment Techniques
- Long-Term Maintenance and Foundation Inspection
A fully loaded 40-foot shipping container can weigh over 67,200 lbs (30,480 kg). That weight concentrated on four corner castings means each contact point bears roughly 16,800 lbs of force. Choosing the wrong base doesn’t just risk cosmetic damage: it risks structural failure, water intrusion, and thousands of dollars in remediation. The question of what base you need for a shipping container depends on your soil type, intended use, local climate, and whether the placement is temporary or permanent. Get the foundation right, and the container performs exactly as designed for decades. Get it wrong, and problems compound fast. Whether you’re setting up on-site storage for a construction project, building a container office, or placing a unit on a rural property, the foundation decision shapes everything that follows. Lease Lane Containers helps buyers across the U.S. plan for site prep and delivery logistics before a container ever leaves the yard, because the base matters just as much as the container itself.
Assessing Site Conditions and Soil Stability
Before selecting any foundation type, you need to understand what’s underneath. Soil composition, water table depth, and natural grade all dictate which base options are viable and which will fail within a season. Skipping this step is the most common and most expensive mistake in container placement.
Clay-heavy soils, common throughout the Piedmont region of North Carolina and much of the southeastern U.S., expand when wet and contract when dry. This seasonal movement can shift a container several inches over a single year. Sandy soils drain well but may lack the bearing capacity to support concentrated loads without compaction. Rocky or gravelly native soil is often the best starting point, but even good soil needs evaluation.
A simple rule of thumb: if you can push a half-inch rebar 18 inches into the ground with moderate hand pressure, the soil is too soft for direct container placement without improvement. For any permanent installation, a geotechnical assessment or at minimum a percolation test gives you real data to work with.
Evaluating Load-Bearing Capacity
Shipping containers distribute their structural load primarily through the four ISO corner castings, not evenly across the bottom rails. Each corner of a fully loaded 20-foot container (max gross weight 52,910 lbs / 24,000 kg) can exert roughly 13,200 lbs of point pressure. The soil beneath each support point needs to handle that without settling unevenly.
Soil bearing capacity is measured in pounds per square foot (psf). Compacted gravel typically supports 4,000-6,000 psf. Undisturbed clay ranges from 1,500-4,000 psf depending on moisture content. Loose fill or topsoil may only manage 500-1,000 psf, which is completely inadequate.
If your site has mixed soil conditions, one corner may settle faster than the others. Differential settlement of even two inches can torque the container frame, jam doors, and compromise the structural seal. For sites with questionable soil, concrete piers or helical anchors bypass the weak surface layer entirely and transfer loads to stable subgrade.
Managing Drainage and Moisture Runoff
Water is the enemy of every foundation type. Standing water beneath a container accelerates corrosion on the undercarriage, degrades wooden flooring from below, and erodes the base material itself. Your site needs positive drainage: water must flow away from the container, not pool underneath or alongside it.
A minimum 2% grade away from the container pad in all directions is the standard recommendation. That translates to roughly a quarter-inch drop per foot. If the natural terrain slopes toward your placement area, you’ll need to regrade or install a French drain system before the container arrives.
In areas with heavy seasonal rainfall, like much of the eastern U.S. where annual precipitation exceeds 45 inches, consider a perimeter swale or gravel trench around the pad. This channels surface water before it reaches the foundation. Neglecting drainage doesn’t just threaten the foundation: it voids the practical benefits of choosing a wind and watertight or cargo worthy grade container, since moisture attack from below bypasses the container’s weather sealing entirely.
Concrete Slab Foundations for Permanent Structures
A poured concrete slab is the gold standard for permanent shipping container installations. It provides uniform support, resists settling, handles heavy loads, and creates a clean, level surface that simplifies delivery and future modifications. The trade-off is cost and commitment: a properly engineered slab for a 40-foot container runs $3,500-$8,000 depending on region, thickness, and reinforcement.
Standard slab thickness for container support is 6 inches with fiber mesh or rebar reinforcement. For containers that will bear heavy internal loads (workshop equipment, inventory storage exceeding 80% of rated capacity), 8-inch slabs with #4 rebar on 12-inch centers provide additional safety margin. The slab should extend at least 12 inches beyond the container footprint on all sides to prevent edge cracking.
One critical detail many contractors miss: the slab surface must be finished to tight tolerances. A variance of more than 3/8 inch across the container footprint will require shimming at the corner castings, partially defeating the purpose of pouring concrete in the first place. Specify a power-troweled finish and verify flatness with a 10-foot straightedge before delivery day.
Reinforced Raft Foundations
A raft foundation, sometimes called a mat foundation, is a thickened concrete slab designed to spread loads across the entire footprint rather than concentrating them at specific points. This approach works particularly well on marginal soils where point-loaded piers might punch through weak layers.
Raft foundations for shipping containers typically use:
- 8-10 inch thickness with thickened edges (12-16 inches at the perimeter)
-
4 rebar grid on 10-inch centers, top and bottom
- Vapor barrier (6-mil poly minimum) beneath the slab
- 4-inch compacted gravel sub-base
The cost premium over a standard slab is 20-35%, but on expansive clay or fill soils, a raft foundation prevents the differential settlement that destroys container alignment. For multi-container configurations, like side-by-side storage units or stacked structures, a raft foundation is often the only concrete option that makes engineering sense.
Local building codes in many jurisdictions, including Wake County, North Carolina, require engineered foundation plans for permanent container structures. Check with your local building inspector’s office before pouring. The Wake County Inspections Department (919-856-6430) can clarify permit requirements for your specific project.
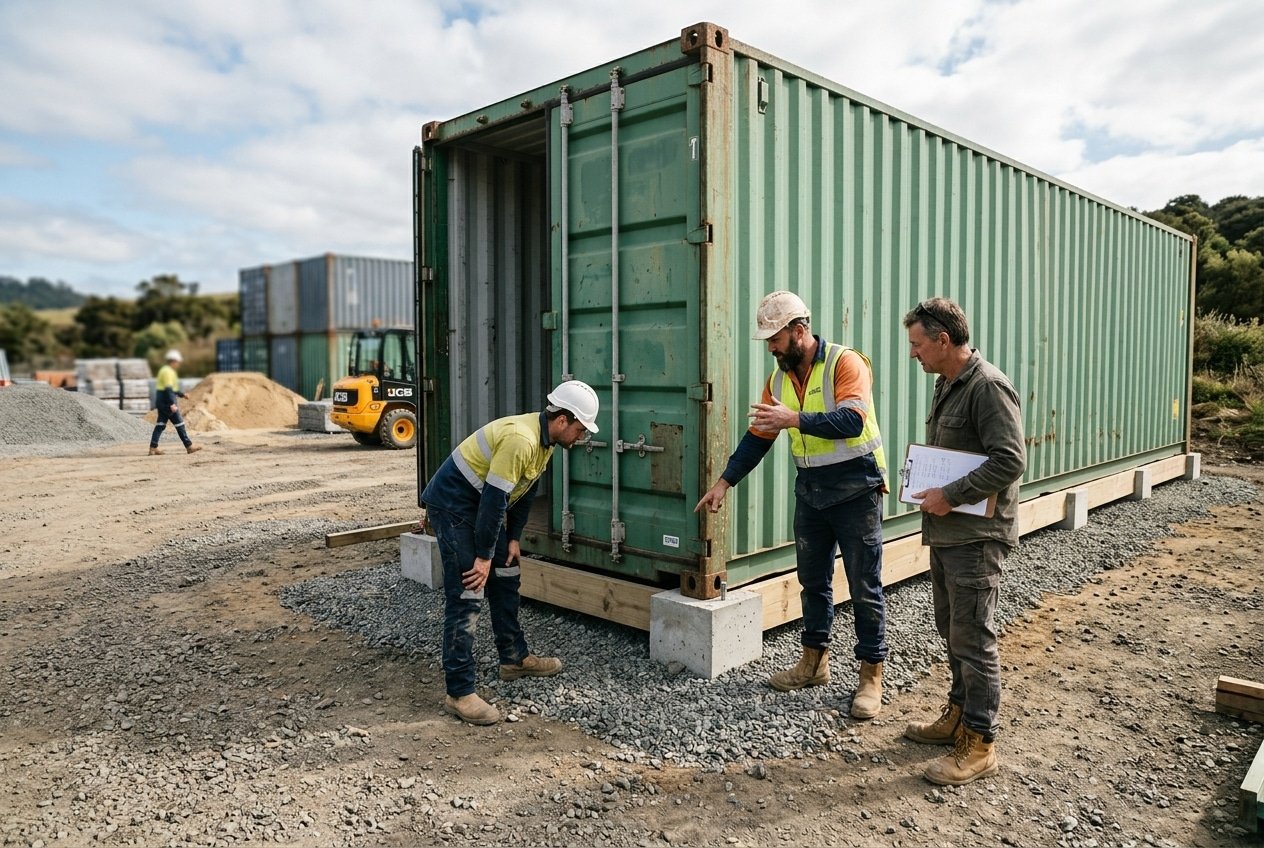
Piers and Footings for Elevated Setups
Pier foundations lift the container off the ground, creating airflow underneath that reduces moisture damage and simplifies utility routing. They cost less than full slabs, disturb less soil, and work well on sloped terrain where a flat pad would require extensive grading. The base you need for a shipping container on a slope is almost always some form of pier or footing system.
Elevation provides real functional benefits beyond moisture control. A 12-18 inch clearance beneath the container allows inspection of the undercarriage, running plumbing or electrical conduit, and retrofitting insulation from below. For container offices or habitable spaces, this clearance is often a code requirement.
Poured Concrete Sonotubes
Sonotube piers are cylindrical cardboard forms filled with concrete and set into excavated holes that extend below the frost line. In central North Carolina, frost depth is approximately 12 inches; in northern states, it can exceed 48 inches. Setting piers below frost depth prevents heaving that would shift the container seasonally.
Standard sonotube sizing for shipping container support:
- 12-inch diameter tubes for lightly loaded containers (empty or partial storage)
- 16-inch diameter tubes for fully loaded containers
- 18-20 inch diameter tubes for stacked configurations or heavy workshop use
- J-bolt or post bracket embedded in wet concrete for securing the container
Four piers, one at each corner casting, is the minimum. For 40-foot containers, adding two intermediate piers at the 20-foot mark prevents bottom rail deflection under heavy loads. Each pier should be poured on a 6-inch gravel footing pad at the bottom of the hole to improve drainage and load distribution.
Sonotube piers typically cost $150-$300 each installed, making a four-pier setup $600-$1,200: a fraction of a full slab. Curing time is 7 days minimum before placing the container, with 28 days for full strength.
Pre-cast Concrete Blocks
Pre-cast concrete blocks offer the fastest pier-style installation. Standard CMU (concrete masonry unit) blocks or purpose-made pier blocks can be placed and leveled in a single day, with the container delivered the same afternoon.
A common configuration uses 8x8x16 inch solid concrete blocks stacked two or three high at each corner casting. Each block weighs approximately 35 lbs and supports around 3,000 lbs individually when properly seated on compacted ground. For a fully loaded container, use a minimum of four blocks per corner, arranged in a pyramid or column pattern.
The limitation of pre-cast blocks is stability. They’re not anchored into the ground, so they resist vertical loads well but offer minimal resistance to lateral forces. In areas prone to high winds or seismic activity, blocks alone are insufficient. Pair them with tie-down straps or welded brackets for security. For temporary storage setups where the container will be relocated within a year or two, blocks provide an excellent balance of cost, speed, and adequacy.
Gravel and Aggregate Pad Solutions
Compacted gravel pads are the most popular foundation choice for shipping container storage applications nationwide, and for good reason. They drain naturally, distribute loads effectively, tolerate minor ground movement, and cost significantly less than concrete. A properly built gravel pad for a 40-foot container costs $1,200-$3,000 depending on material availability and site access.
The ideal gravel pad uses 3/4-inch crushed stone (not river rock, which doesn’t interlock) compacted in 4-inch lifts to a total depth of 6-8 inches. The pad should extend 2 feet beyond the container footprint on all sides. Each lift needs mechanical compaction to 95% density, verified with a plate compactor making at least four passes.
For container delivery planning, the gravel pad also serves as a stable surface for the delivery truck. Tilt-bed trailers need approximately 100 feet of straight approach, and soft ground turns delivery day into a recovery operation. Building the pad before scheduling delivery solves two problems at once.
Installing a Geotextile Layer
A geotextile fabric layer between the native soil and the gravel base is a small investment that dramatically extends the life of your pad. Without it, fine soil particles migrate upward into the gravel over time, a process called subgrade intrusion. Within two to three years, your clean gravel pad becomes a muddy, uneven mess that no longer drains properly.
Installation is straightforward:
- Excavate the pad area to 8-10 inches below finished grade
- Grade the excavation with a 2% slope for drainage
- Roll out non-woven geotextile fabric across the entire area, overlapping seams by 12 inches
- Fold fabric up the sides of the excavation
- Add gravel in 4-inch lifts, compacting each layer
- Trim excess fabric flush with the finished surface
Non-woven geotextile rated at 4 oz/sq yard or heavier provides adequate separation and filtration. Material cost runs $0.15-$0.30 per square foot: roughly $75-$150 for a 40-foot container pad. That small expense prevents $1,000+ in pad rebuilding costs down the road.
Innovative Screw Piles and Helical Anchors
Screw piles, also called helical piers, are steel shafts with helical plates welded along their length. A hydraulic drive head screws them into the ground like oversized bolts, anchoring into stable soil or bedrock well below the surface. They’ve been used in commercial construction for decades and are increasingly popular for shipping container foundations.
The advantages are compelling. Installation requires no concrete, no excavation, and no curing time. A four-pier screw pile foundation can be installed and loaded the same day. Each pile is load-tested during installation: the torque required to advance the pile directly correlates to its bearing capacity, giving you verified load data rather than estimates.
Typical specifications for container applications:
- Shaft diameter: 2-7/8 to 3-1/2 inches
- Helix diameter: 8-14 inches
- Installation depth: 6-15 feet depending on soil
- Load capacity: 15,000-30,000 lbs per pile
- Cost: $300-$600 per pile installed
Screw piles excel on difficult sites: steep slopes, high water tables, expansive clays, and remote locations where concrete trucks can’t access. They’re also fully removable, which matters for temporary installations or leased land where you must restore the site. The environmental footprint is minimal since there’s no excavation spoil and no concrete production involved.
For buyers comparing foundation options, screw piles sit in a middle ground between the permanence of concrete and the simplicity of gravel. They provide engineered, verifiable support without the cost or timeline of a poured foundation.
Eco-Friendly and Temporary Base Options
Not every container placement needs a permanent foundation. Seasonal storage, construction site offices, event structures, and agricultural uses often call for temporary bases that can be installed quickly and removed without lasting site impact. The key is matching the temporary base to the expected duration and load.
For placements under six months on firm, level ground, compacted earth with landscape timber perimeters can work adequately. The timbers define the pad area and provide a slight lip that holds fill material in place. This approach costs under $500 for a 20-foot container and leaves minimal trace when removed.
Recycled rubber mats, originally designed for equestrian arenas and heavy equipment pads, offer another temporary option. They distribute point loads, resist moisture, and can be relocated. A set of four 3×3-foot mats at the corner castings costs $200-$400 and provides a surprisingly stable base on firm soil.
Railroad Ties and Timber Sleepers
Railroad ties placed perpendicular to the container’s length create a simple, effective base that’s been used for decades in rail yards and industrial storage. Two or three ties under each end of the container, positioned beneath the corner castings and cross members, lift the unit off the ground while distributing loads along the tie’s 8.5-foot length.
Used railroad ties cost $15-$30 each, making a full set of six to eight ties a $120-$240 investment. They’re pressure-treated with creosote, which provides excellent rot resistance but raises environmental concerns. Creosote can leach into soil, so this option isn’t appropriate near gardens, wells, or waterways. Check local regulations: some municipalities restrict creosote-treated timber in residential settings.
A cleaner alternative is new pressure-treated landscape timbers (6×6 or 8×8 inch). They cost more per piece ($25-$50) but avoid the creosote issue entirely. When selecting a used shipping container for a farm or rural property, timber sleepers paired with a gravel sub-layer often provide the best balance of cost, speed, and environmental responsibility.
Critical Leveling and Alignment Techniques
A shipping container that’s even slightly out of level creates cascading problems. Doors bind or swing open on their own. Water pools on the roof instead of sheeting off. Internal shelving and racking systems don’t sit plumb. Over time, the frame itself can develop stress points at twisted corner castings. Precision during placement pays dividends for the life of the container.
The target tolerance is 1/2 inch or less of deviation across the full length and width of the container. For a 40-foot unit, that’s demanding: it means the foundation must be accurate to within 1/2 inch over 480 inches of length. Achieving this starts with the foundation, not with after-the-fact corrections.
Before delivery, check your foundation with a laser level or a long spirit level and straightedge. Measure diagonals to confirm the pad is square. A foundation that’s level but not square will cause the container to overhang on one side, creating uneven loading and potential delivery complications.
Shimming and Corner Casting Support
Even with careful foundation preparation, minor adjustments are almost always needed after the container is placed. Shimming is the standard correction method, and doing it properly matters.
Steel shims are preferred over wood for permanent installations. Wood compresses, rots, and attracts insects. Steel plate shims (1/4 to 1/2 inch thick, cut to 6×6 inches minimum) stack to the needed height and maintain their dimension indefinitely. Place shims directly under the corner castings, which are the container’s engineered load transfer points.
The shimming process works best with this sequence:
- Place the container on the foundation
- Check level at all four corners using a rotary laser
- Identify the highest corner as your reference point
- Lift each low corner with a hydraulic jack (20-ton minimum capacity)
- Insert steel shims to bring each corner to the reference height
- Re-check level and adjust as needed
- Verify doors open and close freely
For containers on pier foundations, adjustable screw jacks built into the pier caps allow fine-tuning without lifting the container. These cost $30-$50 each and save significant labor on sloped sites where pier heights vary.
Lease Lane Containers’ Raleigh-based team provides delivery planning support that includes guidance on site preparation and placement requirements, helping you avoid common leveling issues before the container arrives.
Long-Term Maintenance and Foundation Inspection
A foundation isn’t a set-and-forget installation. Soil moves. Water patterns change. Freeze-thaw cycles work on concrete. Gravel compacts and migrates. Annual inspection catches small problems before they become structural failures.
Schedule a foundation check at the start of every spring, after the ground has thawed and settled from winter moisture. Look for these specific indicators:
- Visible gaps between corner castings and support points (indicates settling)
- Cracks in concrete pads or piers wider than 1/8 inch
- Water staining or erosion channels around the foundation perimeter
- Gravel displacement or washout areas on aggregate pads
- Rust staining on the container undercarriage (indicates moisture contact)
- Doors that have become difficult to open or close (indicates frame twist from uneven support)
For gravel pads, plan to add and re-compact a 1-2 inch top layer every two to three years. Budget approximately $200-$400 per application for a 40-foot container pad. Concrete foundations may develop surface spalling in freeze-thaw climates: seal cracks with hydraulic cement before they propagate.
Check tie-down anchors and straps annually. UV exposure degrades synthetic straps, and soil movement can loosen ground anchors. Replace any strap showing fraying, discoloration, or reduced tension. In hurricane-prone or high-wind regions, this inspection should happen before storm season, not after.
Keeping a simple maintenance log with dated photos creates a valuable record. If you ever sell the property or repurpose the container, documented foundation maintenance demonstrates responsible ownership and supports the container’s condition assessment.
Final Checklist
Before your container arrives, confirm these items:
- Soil assessment completed (bearing capacity verified for your load)
- Foundation type selected based on duration, load, and site conditions
- Drainage graded at minimum 2% away from the pad in all directions
- Foundation level checked to within 1/2 inch across full footprint
- Delivery access confirmed (100 ft straight approach for tilt-bed, 14 ft overhead clearance minimum)
- Shimming materials on-site (steel plates for permanent, hardwood for temporary)
- Tie-down hardware ready if required by local code or wind exposure
- Geotextile installed beneath gravel pads
The right foundation protects your investment for the long term and ensures your container performs exactly as intended. If you’re still determining which container size, grade, or configuration fits your project, browse available inventory to compare your options side by side. For questions about site prep, delivery access, or foundation recommendations specific to your location, contact the Lease Lane Containers team for straightforward guidance before you commit.


