
How to Prepare Your Site for Container Delivery
Table of Contents
- Table of Contents
- Assessing Space Requirements and Clearance
- Calculating Total Length for Truck and Trailer
- Evaluating Vertical and Side Clearance
- Selecting and Leveling the Foundation
- Common Foundation Types: Gravel, Concrete, and Blocks
- The Importance of Precision Leveling for Door Function
- Evaluating Ground Conditions and Stability
- Managing Soft Soil and Potential Sinking
- Clearing Obstacles and Ensuring Accessibility
- Removing Debris, Overhanging Branches, and Wires
- Determining Delivery Method and Orientation
- Tilt-Bed vs. Flatbed Delivery Logistics
- Positioning the Doors: Cabin-Facing vs. Rear-Facing
- Securing Legal Permits and Neighborhood Compliance
- Final Site Walkthrough and Delivery Day Coordination
- Final Checklist
Table of Contents
- Assessing Space Requirements and Clearance
- Selecting and Leveling the Foundation
- Evaluating Ground Conditions and Stability
- Clearing Obstacles and Ensuring Accessibility
- Determining Delivery Method and Orientation
- Securing Legal Permits and Neighborhood Compliance
- Final Site Walkthrough and Delivery Day Coordination
A shipping container that arrives on schedule but can’t reach its placement spot is an expensive problem. Drivers charge standby fees, rescheduled deliveries eat into your budget, and a container left roadside overnight creates liability headaches nobody wants. The reality is that most failed deliveries trace back to one root cause: the site wasn’t ready.
Proper site access planning for your shipping container delivery is the single most controllable factor in whether your project starts on time or stalls before the container even touches the ground. Whether you’re a contractor staging materials on a job site in Wake County, a homeowner adding backyard storage, or a rural property owner setting up workshop space off a gravel road, the prep work follows the same principles. This guide breaks down every step, from measuring clearance and preparing your foundation to coordinating with your delivery driver on the day itself. If you’re still comparing container sizes and grades for your project, getting site prep right early will save you from costly surprises once you’ve placed your order.
Assessing Space Requirements and Clearance
Before anything else, you need to confirm that a fully loaded delivery truck can physically reach your placement location. This sounds obvious, but roughly one in five delivery attempts runs into access issues that the buyer didn’t anticipate. The truck and trailer combination delivering your container is significantly larger than the container itself, and every inch of the route from the street to the drop zone matters.
Calculating Total Length for Truck and Trailer
A standard tilt-bed truck carrying a 20 ft shipping container measures approximately 55 to 60 ft in total length. For a 40 ft container, expect the rig to stretch 70 to 75 ft. That length needs a clear, straight path or a turning radius wide enough to swing the trailer into position without clipping fences, buildings, or parked vehicles.
Here’s a practical rule of thumb: measure the distance from the street entry point to your intended container placement, then add 20 ft of buffer beyond the container’s final resting spot. The truck needs room to pull forward past the drop point before tilting the bed to slide the container off. If your driveway curves, measure the inside radius of the curve. Most delivery trucks need a minimum turning radius of 30 ft, and tighter turns may require a different delivery method entirely.
Walk the full route with a tape measure. Note any pinch points where the path narrows, including gate openings, fence lines, and gaps between structures. A standard shipping container is 8 ft wide, but the truck itself may be 8.5 ft wide with mirrors extending further. You need at least 10 ft of clear width for the entire approach.
Evaluating Vertical and Side Clearance
Vertical clearance catches people off guard more than any other measurement. A tilt-bed truck with a container loaded on top sits approximately 13.5 ft high for a standard-height container and up to 14.5 ft for a high cube shipping container. That’s taller than most residential garage doors and many tree canopy lines.
Check for overhead power lines, cable lines, tree branches, building eaves, and carport structures along the entire delivery route. Power lines along residential streets in the Raleigh area typically hang between 15 and 20 ft, but sagging lines or lines crossing a driveway entrance can dip lower. If overhead wires are a concern, contact your utility provider at least two weeks before delivery to discuss temporary line raising.
Side clearance is equally critical. The truck needs roughly 12 to 14 ft of total width clearance when you account for mirrors, swing, and a small margin of error. Narrow driveways flanked by retaining walls, mailboxes, or landscaping features can turn a simple delivery into an impossible one.
Selecting and Leveling the Foundation
The surface your container sits on affects everything from door operation to long-term structural integrity. A container placed on an uneven or unstable foundation will rack over time, meaning the steel frame twists slightly out of square. Once that happens, the doors bind, water pools on the roof, and the container’s lifespan shortens dramatically.
Common Foundation Types: Gravel, Concrete, and Blocks
Three foundation types handle the vast majority of shipping container placements:
- Compacted gravel pad: The most common and cost-effective option. A 6-inch layer of compacted #57 stone or crushed gravel spread over leveled ground provides drainage and load distribution. For a 20 ft container, the pad should extend at least 1 ft beyond the container’s footprint on all sides. Cost typically runs $500 to $1,500 depending on your region and existing ground conditions.
- Concrete slab or footings: Best for permanent installations, container offices, or sites where the container will bear heavy loads. A 4-inch reinforced concrete slab costs more (typically $2,000 to $5,000 for a 20 ft container footprint) but eliminates settling concerns entirely. Concrete pier footings placed at the four corner castings are a more affordable alternative.
- Concrete blocks or railroad ties: A budget-friendly option for temporary placements. Place blocks or ties under each corner casting point and at the midpoint of each long rail. This keeps the container off bare ground, which prevents moisture trapping and rust along the bottom rails.
Each option has trade-offs. Gravel drains well but may shift in heavy rain. Concrete is permanent but requires curing time. Blocks work fast but demand precise leveling.
The Importance of Precision Leveling for Door Function
Shipping container doors are engineered to work within tight tolerances. A level variance of more than 1.5 inches across the container’s length will cause the doors to stick, drag, or fail to latch properly. On a 40 ft container, that’s less than half a degree of tilt.
Use a 4 ft builder’s level across multiple points on your foundation before delivery day. Check both the length and width axes. If you’re using blocks or piers, shim them with steel plates rather than wood, which compresses and rots over time. Spending an extra hour on leveling during prep saves you from fighting stubborn doors for years.
Evaluating Ground Conditions and Stability
Your foundation is only as good as the ground beneath it. A perfectly leveled gravel pad means nothing if it’s sitting on soil that can’t support the load. An empty 20 ft shipping container weighs approximately 4,850 lbs (2,200 kg). A 40 ft container comes in around 8,160 lbs (3,700 kg). Once you fill it with equipment, inventory, or materials, you could be looking at a combined weight of 30,000 lbs or more pressing into a relatively small footprint.
Managing Soft Soil and Potential Sinking
Clay-heavy soils, common throughout central North Carolina and much of the southeastern U.S., expand when wet and contract when dry. This seasonal movement can shift a container several inches over a single year. Sandy soils drain well but compress under sustained load. Loamy topsoil, while great for gardens, is the worst foundation material for heavy structures.
If you’re placing a container on undeveloped land, dig a test hole about 18 inches deep at the planned site. If you hit firm, compacted subsoil within 12 inches, you’re in good shape for a gravel pad. If the soil stays soft, spongy, or waterlogged, you’ll need to excavate deeper and build up a more substantial base.
For soft-soil sites, the standard approach is to excavate 12 to 18 inches of topsoil, lay geotextile fabric to prevent gravel migration into the soil, then fill with compacted road base followed by a top layer of crushed stone. This adds $300 to $800 to your prep costs but prevents the container from sinking unevenly over time.
Avoid placing containers in low spots where water collects after rain. Even wind and watertight containers can develop floor condensation issues when sitting in standing water for extended periods. If your only option is a low area, grade the surrounding soil to direct water away from the container’s footprint and consider French drains along the long sides.
Clearing Obstacles and Ensuring Accessibility
A clear delivery path isn’t just about width and height. It’s about removing anything that could snag, block, or delay the truck during the 15 to 30 minutes it takes to position and offload the container.
Removing Debris, Overhanging Branches, and Wires
Start your obstacle assessment at the street. Stand where the delivery truck will turn in and visually trace the entire route to the drop zone. You’re looking for anything within a 14 ft vertical envelope and a 12 ft horizontal envelope along the full path.
Common obstacles that stop deliveries:
- Tree branches below 15 ft along the driveway or access road
- Low-hanging power, cable, or phone lines at the driveway entrance
- Decorative fencing, stone pillars, or mailboxes that narrow the entry
- Parked vehicles, trailers, or equipment along the route
- Temporary construction materials, dumpsters, or debris piles
- Sprinkler heads, landscape lighting, or irrigation lines near the placement area
- Septic tank lids or drain field areas that can’t support truck weight
Trim branches at least 48 hours before delivery so you have time to haul away debris. If you need utility lines raised temporarily, Duke Energy and other North Carolina providers typically require 5 to 10 business days’ notice. Mark any underground utilities with flags or paint using the NC 811 service (call 811 at least three business days before any ground disturbance).
Move vehicles, equipment, and anything mobile well clear of the path. Drivers won’t wait while you shuffle cars around, and standby fees typically run $75 to $150 per hour.
Determining Delivery Method and Orientation
How your container arrives and which direction it faces when placed are decisions that affect both the delivery process and your daily use of the container for months or years afterward.
Tilt-Bed vs. Flatbed Delivery Logistics
Two primary delivery methods handle most residential and commercial container placements:
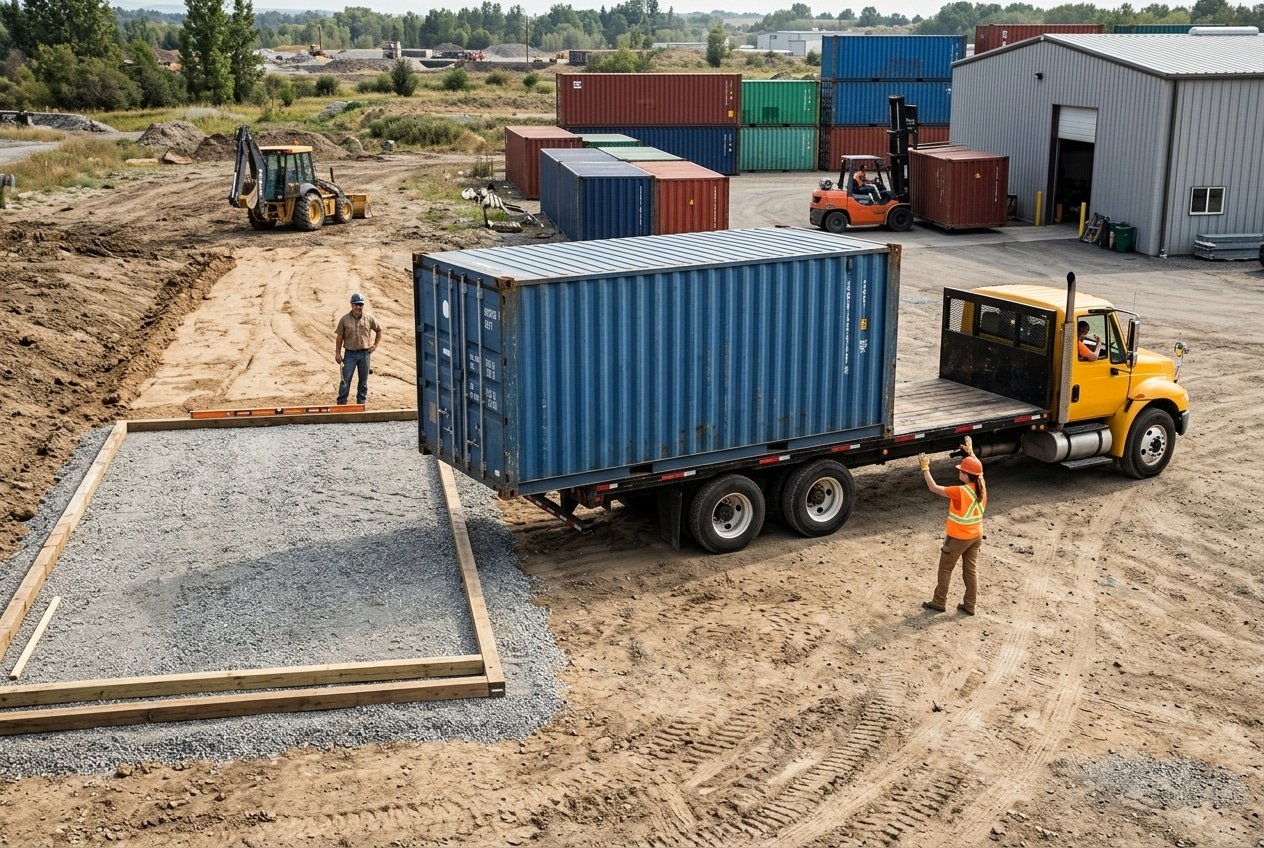
Tilt-bed trucks (also called rollback or slide-off trucks) are the most common method for 20 ft containers and some 40 ft units. The truck backs into position, tilts the bed to a roughly 15-degree angle, and the container slides off the rear onto the ground. This method requires the truck to pull forward approximately 1.5 times the container’s length beyond the drop point. For a 20 ft container, that means about 30 ft of clear space ahead of the placement spot.
Flatbed delivery with a crane or forklift is used when the site can’t accommodate a tilt-bed approach, such as tight lots, urban locations, or placements behind existing structures. A crane can lift a container over obstacles and place it with precision, but crane delivery adds $500 to $2,000 to your cost depending on the crane size and duration. Lease Lane Containers’ Raleigh-based team can help you evaluate which delivery method makes sense for your specific site conditions.
For rural properties accessed by unpaved roads, confirm that the road surface can handle a loaded truck weighing up to 50,000 lbs gross. Soft dirt roads, especially after rain, can trap a delivery truck and create a recovery situation that costs everyone time and money.
Positioning the Doors: Cabin-Facing vs. Rear-Facing
Container door orientation seems like a minor detail until you’re walking 40 ft around the container every time you need to access your stored materials. Think through your daily use pattern before the container arrives.
If the container backs up against a fence or wall, the doors obviously face outward. But on open sites, you have choices. Face the doors toward your primary access point, whether that’s a driveway, building entrance, or work area. For security, some owners prefer doors facing the house where they’re visible from a window.
On sloped sites, orient the doors on the downhill end. This prevents rainwater from pooling at the door threshold and makes it easier to roll heavy items in and out. The 1-inch gap beneath standard container doors is enough for water intrusion if the door end sits at the low point of a slope.
Securing Legal Permits and Neighborhood Compliance
Permit requirements for shipping containers vary dramatically by jurisdiction. Some rural counties in North Carolina have zero restrictions on placing a container on your own property. Municipalities like Raleigh, Durham, and Cary have specific zoning rules that may require permits, limit placement duration, or restrict container use to certain zones.
Contact your local planning or zoning department before ordering your container. In Wake County, the Planning, Development, and Inspections department handles these inquiries and can be reached at (919) 856-6300. Ask specifically about temporary vs. permanent structure classifications, setback requirements from property lines, and any aesthetic screening requirements such as fencing or landscaping around the container.
HOA communities add another layer. Many homeowners’ associations prohibit shipping containers outright, or require architectural review board approval. Check your covenants, conditions, and restrictions (CC&Rs) document before committing to a purchase. Getting a container delivered only to receive a violation notice the following week is a situation no one wants.
For commercial properties, the permitting process may involve site plan review, fire marshal approval (especially for container offices or occupied structures), and compliance with ADA accessibility requirements if the container will be open to the public. Budget two to six weeks for commercial permit processing in most North Carolina jurisdictions.
If you’re placing a container on leased land, get written permission from the property owner. This protects both parties and is often required as part of the permit application.
Final Site Walkthrough and Delivery Day Coordination
The 24 hours before delivery are when preparation meets execution. A final walkthrough catches last-minute issues that crept in since you first prepped the site, whether that’s a neighbor’s car parked in the way, a branch that fell after a storm, or a sprinkler that ran overnight and softened the ground.
Walk the delivery route one final time. Confirm vertical clearance hasn’t changed (branches grow, temporary wires get strung). Verify the foundation is still level and dry. Remove any tools, materials, or debris from the drop zone and the surrounding 10 ft buffer area.
Contact your delivery driver or dispatch the day before to confirm the delivery window, the truck type, and any special instructions. Provide your phone number so the driver can call when they’re 15 to 30 minutes out. Be present on site during delivery. The driver will need you to confirm exact placement, and small adjustments are only possible while the container is still on the truck bed or in the air.
On delivery day, have the following ready:
- A clear, marked drop zone with the foundation prepared and level
- All gates open and secured so they won’t swing into the truck’s path
- Vehicles and equipment moved at least 20 ft from the delivery route
- A phone charged and on, with the driver’s contact number saved
- Any shims, blocks, or leveling materials on hand for final adjustments
Once the container is placed, check the level immediately and test both doors before the driver leaves. If the container needs to shift a few inches, the driver can often make that adjustment on the spot. After the truck departs, repositioning requires a crane or heavy equipment.
Final Checklist
- [ ] Measured full delivery route: width (10+ ft), height (14.5+ ft), length (truck + buffer)
- [ ] Foundation prepared, leveled, and verified within 1.5 inches tolerance
- [ ] Ground conditions assessed; soft soil addressed with gravel and fabric
- [ ] All overhead branches trimmed above 15 ft; utility lines checked
- [ ] Underground utilities marked via 811 service
- [ ] Delivery method confirmed (tilt-bed or crane) based on site conditions
- [ ] Door orientation decided based on daily use and drainage
- [ ] Local permits obtained; HOA approval secured if applicable
- [ ] Final walkthrough completed within 24 hours of delivery
- [ ] Driver contacted with confirmed delivery window and site directions
Getting your site ready for container delivery takes real effort upfront, but it pays off the moment that truck backs in and the container slides into place exactly where you planned. Every hour spent measuring, leveling, and clearing saves you from delays, extra fees, and the frustration of a container that doesn’t sit right. If you’re ready to move forward, browse available inventory at Lease Lane Containers to compare sizes, grades, and options for your project. Have questions about site access or delivery logistics? Contact us and our team will help you plan a delivery that goes right the first time.


